

How to Stretch Ears Safely: A Step-by-Step Guide for Beginners
Stretching your ears safely comes down to three things: the right tools, the right pace, and the right aftercare. Skip any one of these, and you risk blowouts, scarring, or infections that can set your journey back by months — or cause permanent damage.
The good news? When done correctly, ear stretching is a slow, satisfying process that most people find completely manageable. This step-by-step guide covers everything a beginner needs to know, from checking whether your piercing is ready to choosing the right plug material once you’ve healed.
Before You Start: Is Your Piercing Ready to Stretch?
The most common mistake beginners make isn’t about technique — it’s timing. Attempting to stretch a piercing that hasn’t fully healed is the fastest route to scarring, infection, and a setback that can take months to recover from.
How long should you wait? If you’ve just had your ears pierced, give them at least 3–6 months to fully heal before you consider stretching. This timeline varies depending on your body, the piercing method, and how well you’ve cared for the fresh piercing.
Here’s how to know your ears are ready:
- There’s no discharge, crusting, or tenderness around the piercing
- The jewelry moves freely without resistance or discomfort
- The skin around the piercing looks and feels normal, not red or inflamed
- You’ve been wearing the same size jewelry for at least a few months without any issues
If all of the above are true, you’re ready to start. If not, give it more time. There is no benefit to rushing this step, and a lot to lose.
What You’ll Need: Your Ear Stretching Starter Kit
Before your first stretch, gather your tools. Having everything ready before you begin means you won’t have to scramble mid-process — which is exactly when mistakes happen.
Ear Tapers These cone-shaped tools are the most common way to begin stretching. They’re narrow at one end and wider at the other, allowing you to gently guide your piercing to a larger size. Always choose steel or glass tapers — never acrylic. Acrylic is porous, harder to sterilize, and has a rougher surface that can cause micro-tears in the tissue.
Single Flare Plugs (in your next size up) After you’ve used the taper, you’ll immediately follow it with a plug. For your first stretches, single flare plugs are strongly recommended over double flare. Double flare plugs require your ear to stretch over the flared edge just to insert them — something a freshly stretched lobe is not ready for. Single flare plugs with an O-ring go in smoothly and hold securely without putting extra stress on new tissue.
For initial stretches, glass or surgical steel plugs are the safest choice. Once your ears have healed and you’re comfortable at a given size, natural materials like stone ear plugs or wood ear plugs become excellent options — non-porous, easy to clean, and genuinely beautiful to wear.
Lubricant Never attempt a stretch without lubricant. A dry stretch creates unnecessary friction, increases the risk of micro-tears, and makes the whole process more painful than it needs to be. Good options include:
- Jojoba oil — the most popular choice, as its composition closely mimics your skin’s natural oils
- Vitamin E oil — moisturizing and gentle, good for promoting skin elasticity
- Dedicated stretching balm — many body jewelry brands make balms specifically formulated for this process
A small amount goes a long way. Apply a thin layer to the taper and your earlobe before each stretch.
Sterile Saline Solution You’ll use this for aftercare — more on that in the steps below. A simple sterile saline wound wash (like the kind sold at pharmacies) works well. Avoid homemade salt water solutions, as the concentration is hard to control and can irritate healing tissue.
How to Stretch Your Ears: Step-by-Step
Work through these steps slowly and without rushing. The whole process for a single stretch should take about 10–15 minutes.
Step 1: Warm Up Your Earlobes
This step is non-negotiable — don’t skip it.
Warm skin is significantly more elastic and pliable than cold skin. Spending a few minutes warming your earlobes before a stretch can be the difference between a smooth, painless process and one that feels forced and uncomfortable.
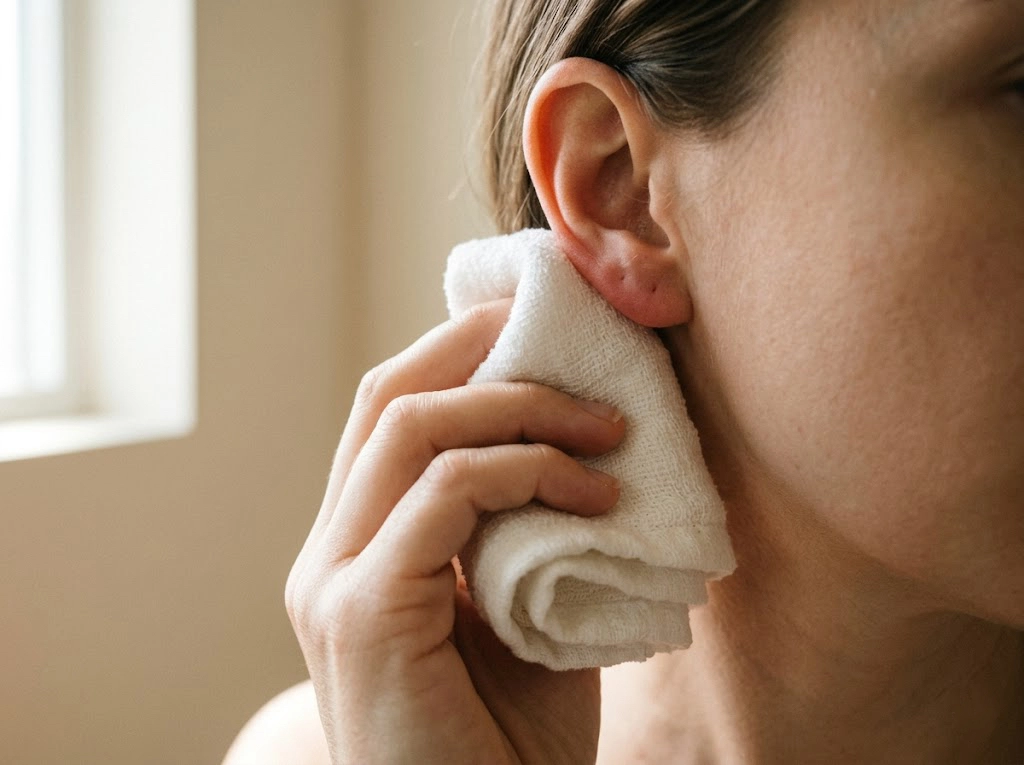
The easiest method: take a hot shower first. The steam and warmth naturally soften the skin and increase blood flow. If a shower isn’t practical, soak a clean washcloth in warm (not scalding) water, wring it out, and press it against your lobes for 5–10 minutes.
Step 2: Clean Your Hands, Ears, and Tools
Cleanliness at this stage prevents infection. Wash your hands thoroughly with soap and water. Spray or wipe your tapers and plugs with saline solution or rubbing alcohol, and allow them to dry completely before use.
Step 3: Apply Lubricant
Apply a small amount of jojoba oil or your chosen lubricant to both the taper and your earlobe. You want a thin, even coating — not so much that the taper slides uncontrollably, but enough that it moves smoothly without friction.
Step 4: Insert the Taper Slowly
Hold the taper at the narrow end and begin guiding it into your piercing. Move steadily and slowly — there’s no benefit to going fast here.
As the taper moves through, you’ll feel a sensation of pressure. Pressure is normal. Pain is not. If at any point you feel sharp pain or significant resistance, stop immediately. Remove the taper, apply a little more lubricant, and try again gently. If the resistance continues, it’s a sign your ear isn’t ready for this size yet — step back down and give it more time.
Continue guiding the taper through until the larger end is sitting in your piercing.
Step 5: Follow Immediately with Your Plug
With the taper still in place, align your single flare plug directly against the wider end of the taper and push them through together in one smooth motion, so the plug follows right behind the taper into the piercing. Secure the O-ring on the back to hold the plug in place.
Do not wear the taper as jewelry. Tapers are tools, not plugs — wearing them long-term puts uneven pressure on your piercing and can cause it to heal unevenly or develop scar tissue.
Step 6: Aftercare — The First 48 Hours
What you do immediately after a stretch matters as much as the stretch itself.
For the first 48 hours:
- Saline soaks: Twice a day, hold a small cup of sterile saline against each ear for about 5 minutes. This keeps the area clean without over-drying or irritating new tissue.
- Don’t twist or rotate your plugs. This is an outdated aftercare myth that actually causes irritation and disrupts the healing process. Leave them alone.
- Avoid submerging in water — no swimming pools, lakes, or hot tubs until the initial healing is complete (typically 1–2 weeks).
- Sleep on a travel pillow if the pressure of a standard pillow causes discomfort.
Step 7: Daily Maintenance While Healing
After the initial 48 hours, continue saline soaks once a day for the first few weeks. Additionally, incorporate a daily earlobe massage into your routine:
Remove your plugs, apply 2–3 drops of jojoba oil to your fingertips, and gently massage each lobe for a few minutes. This increases blood flow to the tissue, helps prevent scar tissue buildup, and significantly improves skin elasticity over time. Many long-term stretchers credit regular oil massage as one of the most important habits for healthy, flexible lobes.
Step 8: Wait Before Your Next Stretch
This is where patience separates a healthy stretching journey from a problematic one.
At minimum, wait 2–3 months before attempting your next size up. Many experienced stretchers and piercers recommend waiting 4–6 months, particularly at larger sizes. The reason: your skin needs time to generate new cells and rebuild collagen — the protein that gives skin its elasticity. Collagen remodeling is a slow biological process that can’t be rushed.
A useful test before moving up: your current plugs should feel completely loose and comfortable, with no tightness whatsoever. If there’s any sensation of resistance when you insert them, you need more time.
Choosing the Right Plug Material After Stretching
Once your ears are stable and fully healed at a given size, you have a lot more material options available to you. Here’s a quick overview:
Glass and Surgical Steel Best for active stretching and healing phases. Non-porous, smooth, easy to sterilize, and hypoallergenic. These are your go-to materials whenever your ear is in a healing phase.
Natural Stone Once healed, natural stone ear plugs are one of the most popular choices among experienced wearers. Stone is non-porous (making it more hygienic than wood for healing lobes), and every piece is genuinely unique — no two stones share exactly the same pattern or color. Obsidian, labradorite, tiger’s eye, and African turquoise are particularly popular choices. For a detailed breakdown of the best options, see our guide to the best stone ear plugs.
Wood Lightweight and organic-feeling, wood ear plugs are a favourite at medium to large sizes where the weight of stone can become noticeable over long wear. Note that wood is porous, so it’s best reserved for fully healed, stable lobes rather than active healing phases.
Resin Resin ear plugs offer the widest range of colours and designs, and are lightweight enough to wear comfortably at larger sizes. A good choice if you want something bold and eye-catching.
Common Ear Stretching Mistakes to Avoid
Even with the best intentions, these are the errors that trip up most beginners:
Skipping sizes. This is the single most common cause of blowouts and permanent damage. The gauge system exists for a reason — each increment represents a manageable increase in tissue stretch. Going from 14g to 8g in one step isn’t brave, it’s a shortcut to a painful setback.
Stretching without lubricant. There is no scenario where a dry stretch is a good idea. Always lubricate, even if you think it’ll be fine without it.
Stretching too soon. If your ears feel tight, look red, or have any discharge, they are not ready. More time is always the right answer.
Using acrylic tapers. Acrylic is porous, meaning bacteria can survive on its surface even after cleaning. It also has microscopic surface irregularities that create friction. Use glass or steel.
Using heavy jewelry to stretch. It might seem logical that heavier jewelry would gradually stretch your lobes, but research from the American Academy of Pediatrics has found that using weights for stretching causes earlobe deformities rather than clean, even stretching. Use proper stretching methods instead.
Rotating your plugs. An old piercing aftercare myth. Rotating plugs disrupts the healing tissue and introduces bacteria. Leave them in place and clean around them.
Frequently Asked Questions
When done correctly, ear stretching should feel like pressure — not pain. A mild stretching sensation is normal; sharp pain or burning is a signal to stop immediately. If stretching hurts, it usually means the ear isn’t ready, there’s not enough lubricant, or you’re moving too fast.
Starting with a standard piercing (20g/0.8mm) and reaching 00g, following safe practices, typically takes 2–4 years. This sounds like a long time, but the slow pace is what keeps your lobes healthy and elastic throughout the journey.
A blowout is when the inner lining of your piercing is pushed outward during a stretch, creating a collar of tissue behind the lobe. It’s caused by stretching too quickly or too forcefully. If you notice a blowout, downsize immediately to your previous size, continue aftercare, and give the tissue time to recover before trying again.
Technically yes, but it’s generally better to stretch both ears together. Keeping both sides at the same size makes it easier to find matching jewelry and ensures both lobes develop similar elasticity.
Most people start with a standard piercing at 20g or 18g, making 14g (1.6mm) the recommended first stretch size. Not sure what size you’re currently at? Our ear gauge size chart converts gauge numbers to millimeters so you can plan your next steps.
Ready to Find Your Next Pair?
Once your ears are healed and comfortable at your current size, exploring new materials is one of the most enjoyable parts of the stretching journey. Browse our full collection of handcrafted natural stone ear plugs — including obsidian, labradorite, African turquoise, and rare dinosaur bone fossil — all available in single flare and double flare styles, from 6mm (2G) to 32mm, sold in pairs.
Have a question about sizing, materials, or the stretching process? Contact us — we’re happy to help.